
Creating your experience
Setting up your experience:
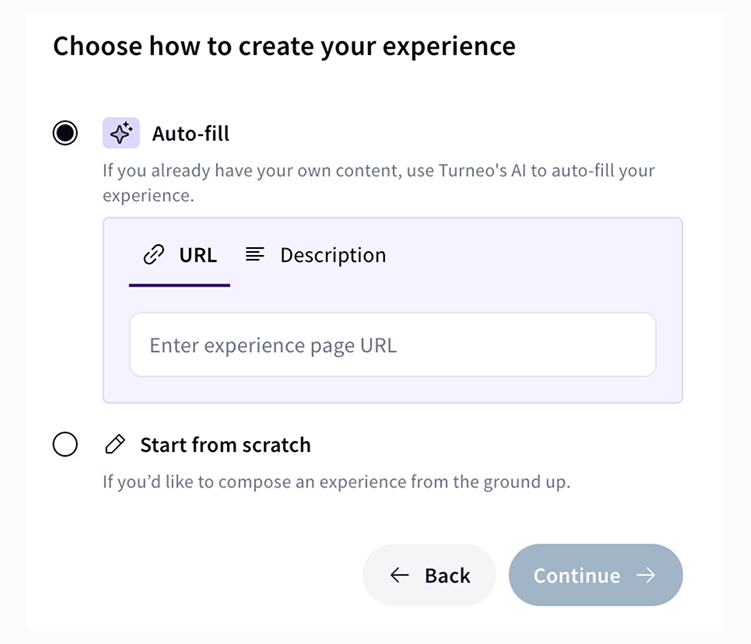
1️⃣ Use AI pre-fill or start from stratch
If you have existing content you can pre-fill your Turneo experience page with built-in AI features.
- Add URL or text containing your existing content and do a final edit of the pre-filled page before it goes live.
If you do not have existing content start building an experience page from scratch.
- Use AI features to help you optimise your writing and formatting.
2️⃣ Key parts of building an experience
Building your experience page consists of 4 steps:
- Experience details
- Here you'll add all images, descriptions, title and experience details
- Dates & Prices
- Adds your pricing, booking options and availability details
- Translations
- You can manually upload translations or use default AI translations we add for each experience.
- Settings
- Set up cancellation, commission and notification settings
Let's dive deeper into best practices for each step.
3️⃣ Set up your experience details
The first step is to upload a minimum of 3 images.
We recommend high-quality images (e.g 1400x600) showcasing a mix of experience setting, atmosphere and key details. Select the best one as your cover. You can also add a video to further engage the audience.
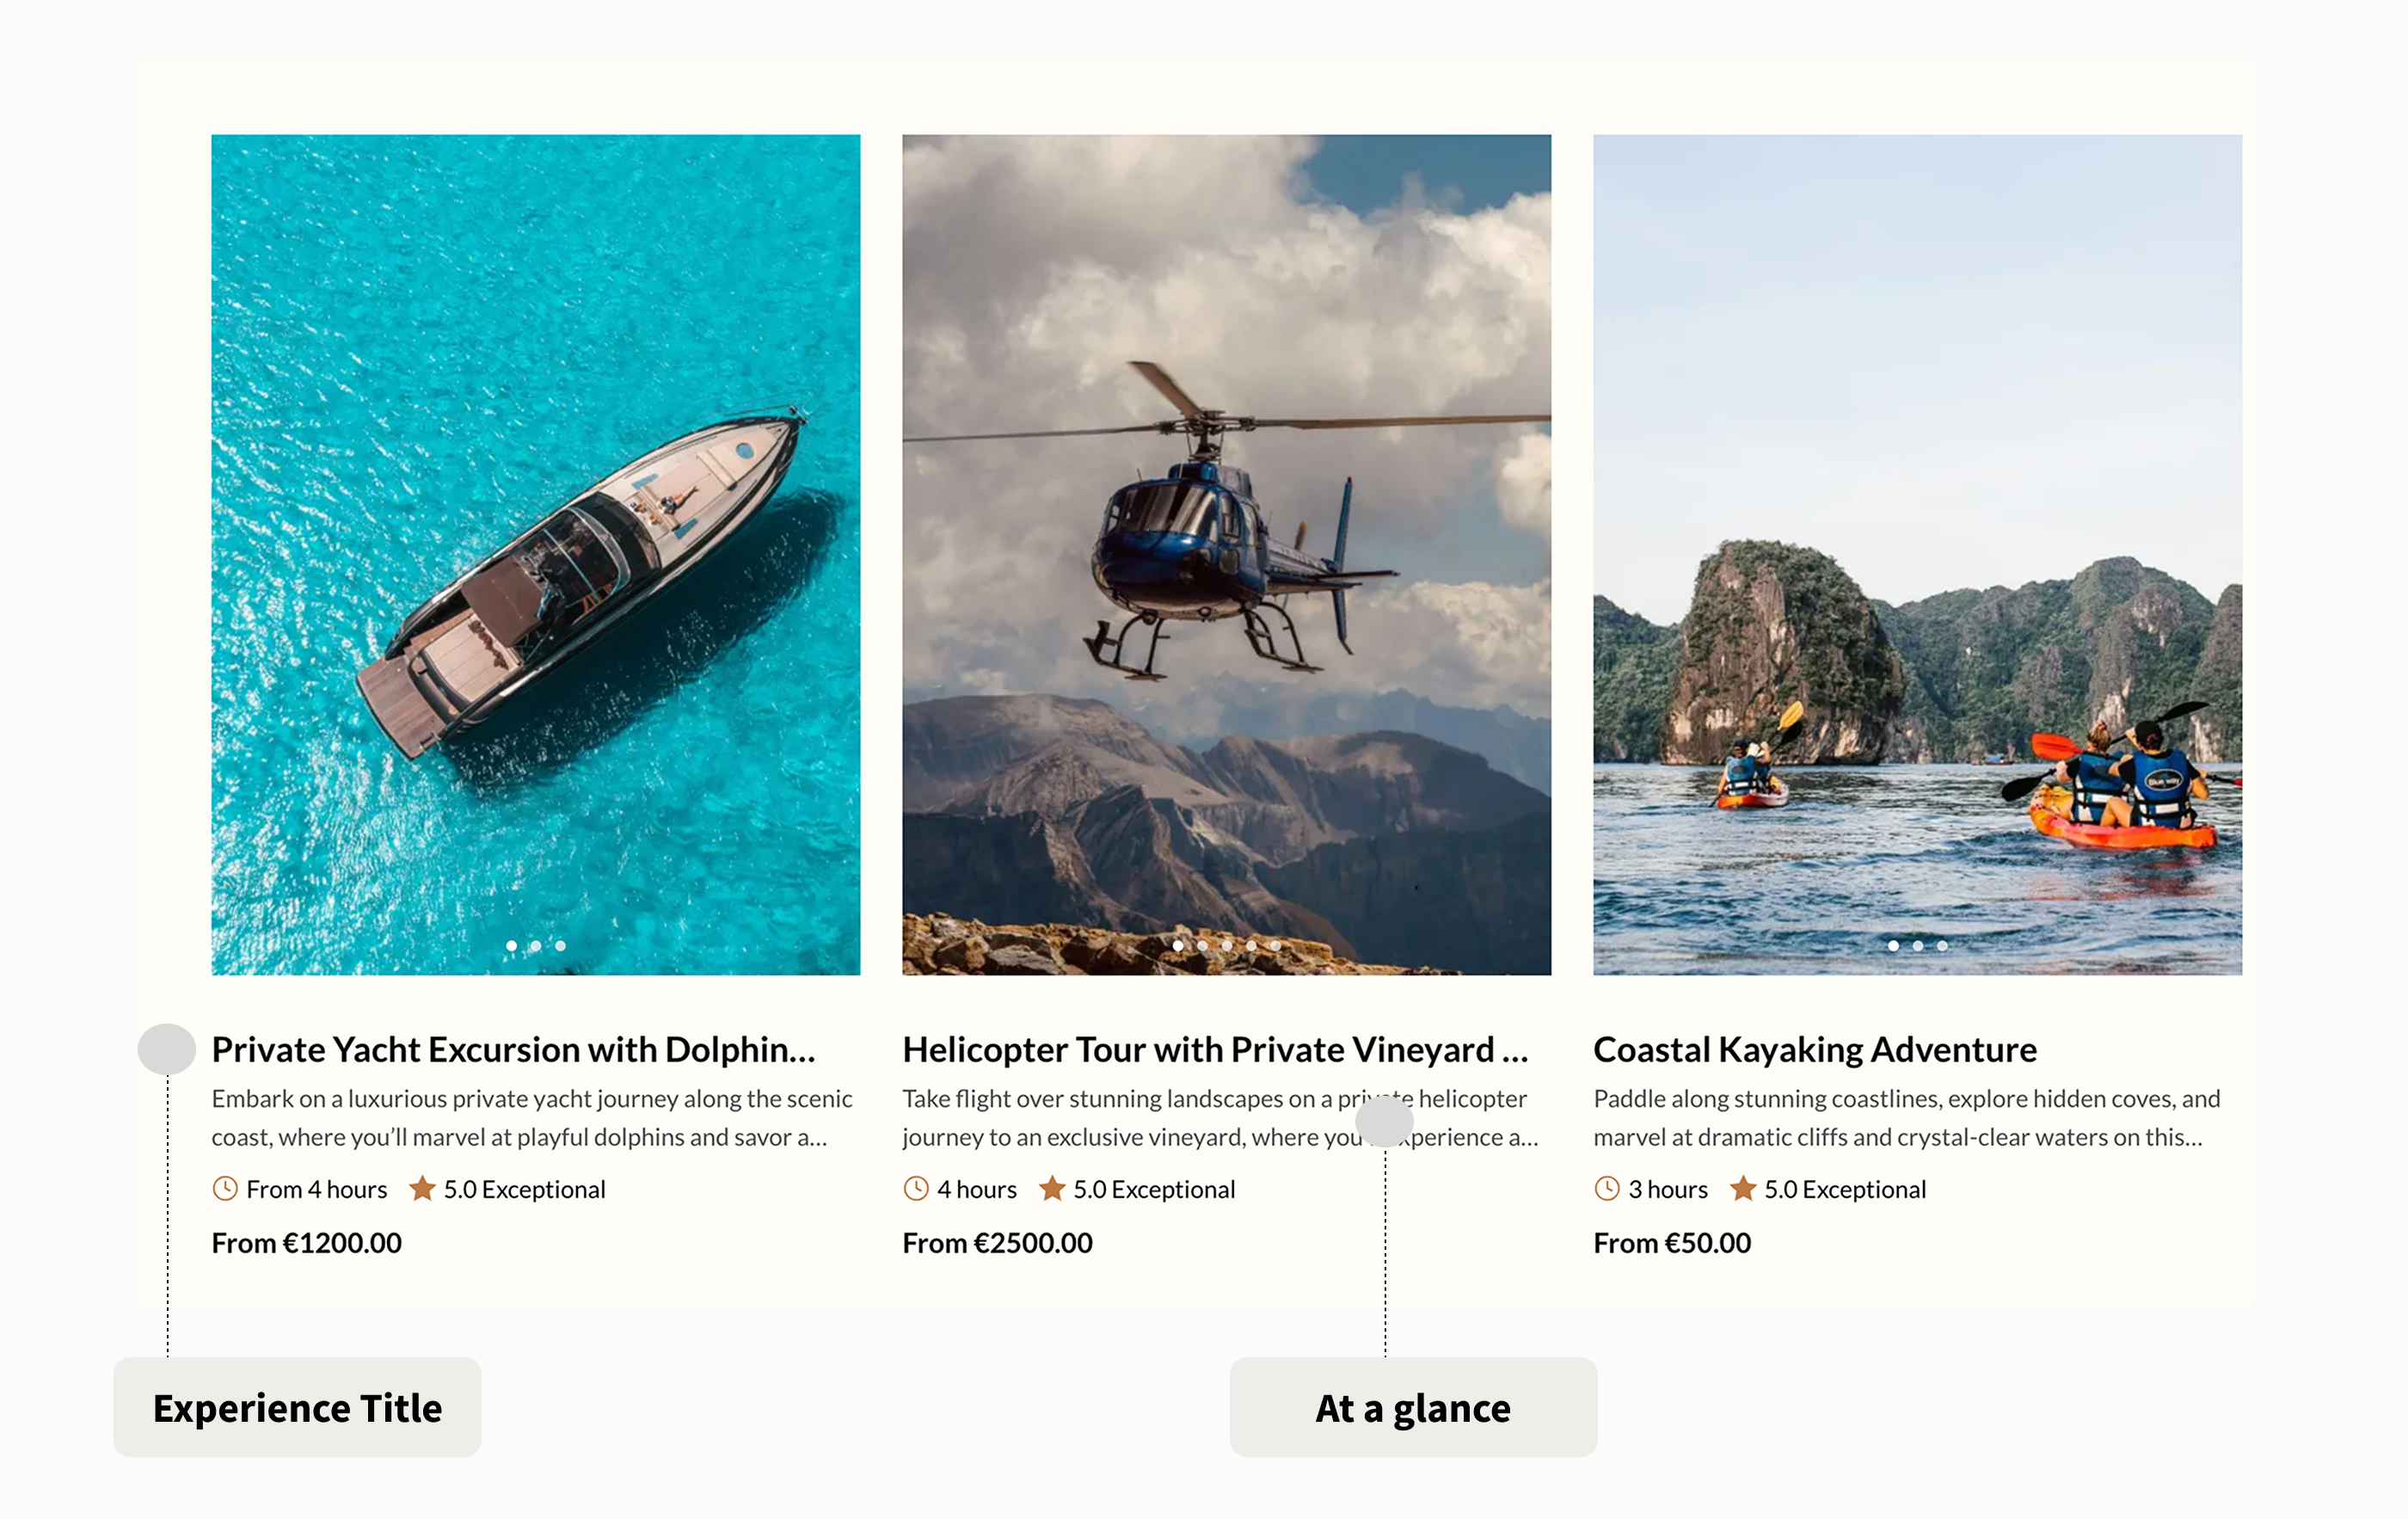
Next, add your experience title.
It will be visible on your website before guests click on the specific experience so make sure it's clear and it grabs attention with 40-70 characters.
After the title, add the description of your experience.
This is the main section where you outline all details about your experience and explain to guests how will your experience help them create a life-long memory.
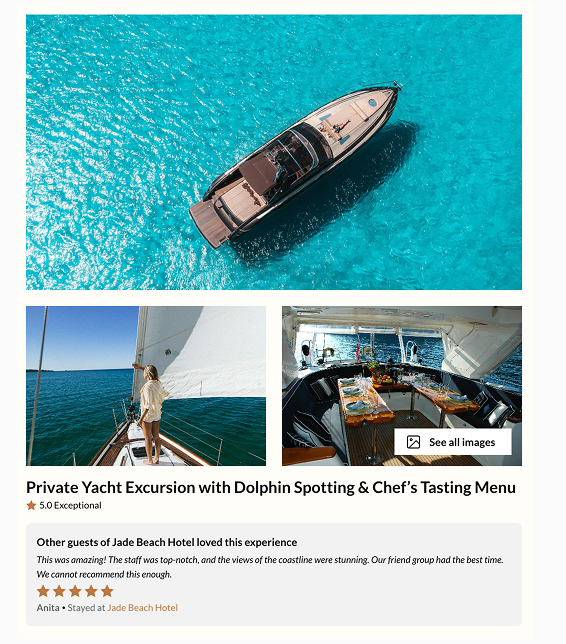
"At a glance" section should include a short summary of the experience.
In 1-2 sentences, add more details on your experience compared to the title but narrow down to key highlights as you already added a full description of your experience.
Guests will see both experience title and a part of your at a glance section before clicking on your experience.
What’s included vs. excluded: make it clear what the experience does or does not include in the listed price
Set a meeting or a pickup point to let guests know where to arrive for the beginning of the experience.
There are three options for experience meeting point:
- Hotel pick up: you will meet each traveler at their hotel and drop them off there once the experience is completed
- Central meeting point: you will meet the traveler at a pre-agreed point to start the experience.
- Multiple pick-up points: you will meet the traveller at the first pick up point, then meet other travellers at a second pick up point
You can offer both a pick up point and a central meeting point for travellers to choose when booking. You will see details of their choice in the booking confirmation email.
4️⃣ Dates & Prices
This is where you set up how guests book and pay for your experience, using Options.
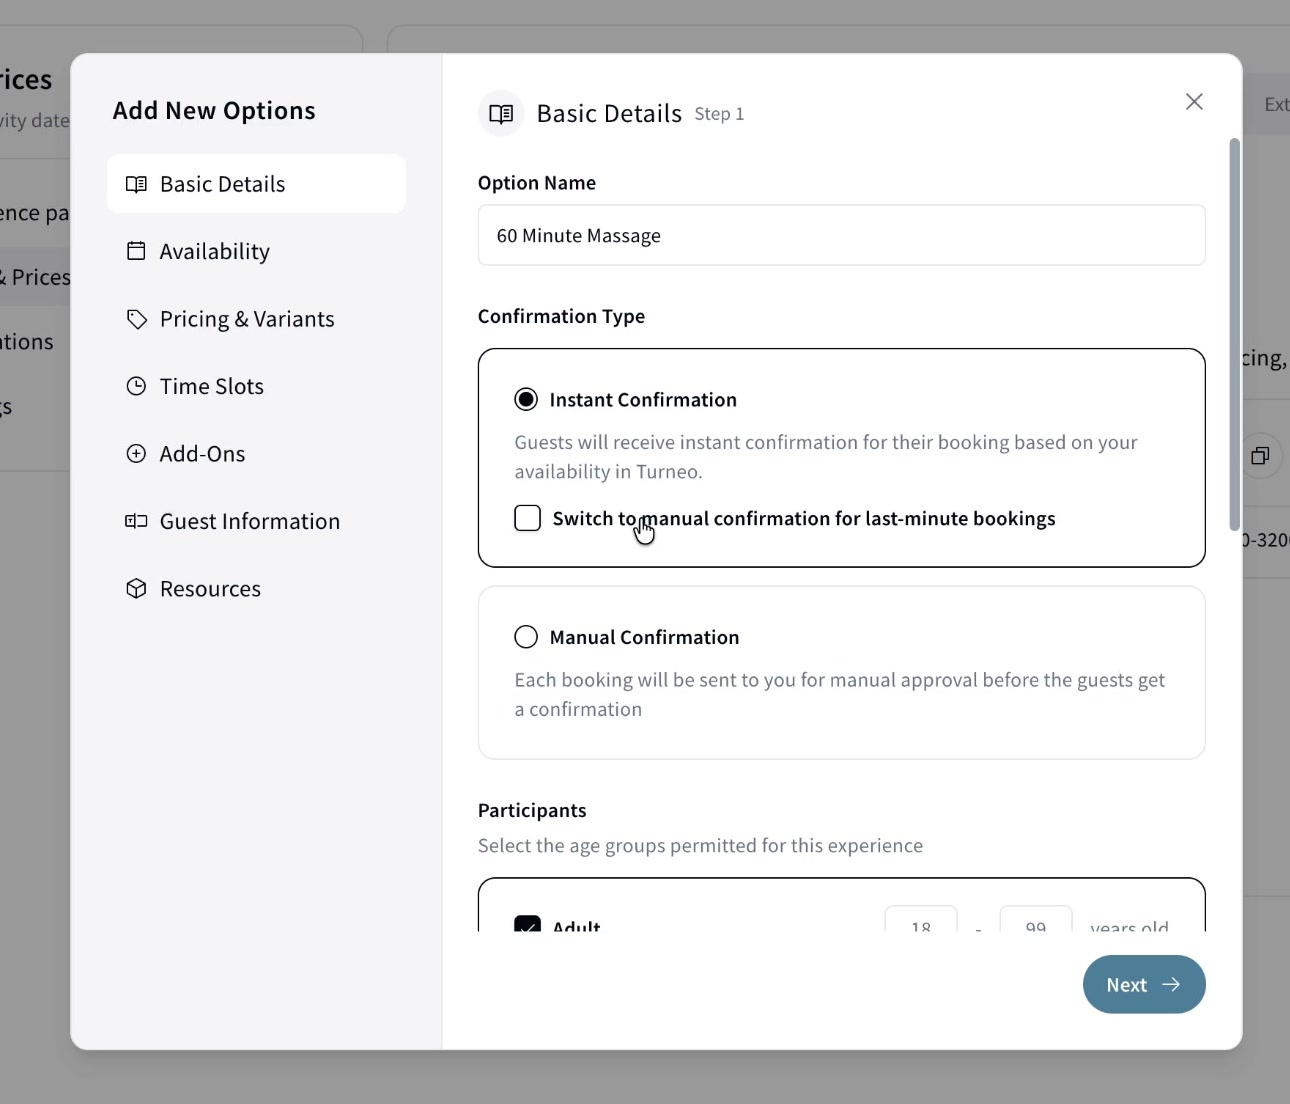
What's an Option? An Option is one bookable configuration of your experience (e.g. "60 Minute Massage" or "Transfer from Hotel to Airport"). An experience can have one or more. Open the Dates & Prices tab and click Add New Option to start.
How it's booked. Choose Managed by Turneo to set everything up in Turneo, No Reservation to just link out to more information, or External System to connect a provider like Bokun or Regiondo.
Setting up an Option runs through a short wizard: Basic Details, Availability, Pricing & Variants, Time Slots, Add-Ons, Guest Information, and Resources. Each step covers one part of how guests book, from pricing models and variants to availability and shared resources.
👉 For the full step-by-step walkthrough, see Setting up an Option.
5️⃣ Translations
Languages not added by you will be automatically translated using AI.
However, visitors will be able to distinguish between creator-added languages and AI-translated content.
To add a manual translation, select a language and edit translations directly within Turneo.
If you are creating a new experience you will first need to publish to see or edit AI-generated translations.
For existing experiences, you will see the translation when you click on a language.
6️⃣ Experience Settings
Cancellation settings: the window before which a guest can cancel and receive a full refund
You can choose:
- At least 24 hours before the experience start time
- At least 72 hours before the experience start time
- At least 7 days before the experience start time
- At least 14 days before the experience start time
- Non-refundable
Cut-off settings: the latest point in time a guest is able to book an experience before it starts
Commission settings: for in-house experiences set the commission to 0%. For external experiences, your organisers will set the commission based on your agreement.
Notifications: setup an email which will receive each booking notification
Support contact: setup contact details guests can use if they have any questions on the experience